
Happy New Year!
Bea isn't a fan of clothes per sé, as many dogs aren't (take note silly doggie fashion boutiques). Although she has a hand knitted jumper and a coat, one of which I make her wear when it's really chilly out, in all honesty she'd rather gamble about naked, happy as Larry.
...Until recently. When faffing about on Audrey the sewing machine a few weeks ago I whipped up a doggie bandanna. Bea looked very sweet in it but really I expected her to protest and chew it up within five minutes. But to my surprise she loved it! She paraded around the house, showing it off, then attempted to sleep on her face (I kid you not) so I couldn't take it off her. Perhaps, I thought, Bea has finally succumbed to my love for vintage fabrics!
(I apologise for her ears in the following photos - they just would not behave. In fact, I'm thinking of selling the one of her in red to the RAF for their next recruitment campaign.)

Since then I have made a few more in different colours. They are so quick and easy to make and your pooch could have an entire new wardrobe in less than an hour. They also make the ideal - postable - gift for the dog owner friend who has everything. I've never met a human who isn't as happy to receive a gift for their adored pet as they are for themselves! They make a brilliant way to use up fabric scraps, too.
You will need:
Your chosen fabric, ironed
Card
Half a metre of bias binding
Pins
Sewing machine (you can just as easily hand sew, it'll just take you longer)
Fabric marker pen/ tailor's chalk
1. Measure across your pooch's chest, then draw a line of the same length on your card, adding an extra centimetre for the seam allowance. Then add two more lines to make a triangle. How deep your triangle will be is up to you - I made Bea's fairly shallow because I didn't want her chewing the bottom corner.

2. Cut out your template and label it. I keep all my project templates in a tin then I can quickly make more in the future. Draw two triangles on the wrong side of your fabric and cut them out. Now pin, right sides together.

3. Leaving 5mm seam allowance, sew the 'v' of your triangle. Don't bother with the top edge. Turn it right side out, and trim the pointy bits off on the top edge.

4. Take your bias binding and fold in half with your fingers, all the way down the length. You could do this with the iron, but it often the iron removes the starch and makes the binding too stretchy. Position your triangle in the middle in the fold, pin, and sew along the entire length of the binding.

5. Finished! You can knock up many more really quickly, and they're machine washable too (well, a doggie mum thinks about these things). Also, if you're happy to use the same colour bias binding every time, you could make triangles in different fabrics and sew them all at once - just like bunting - snipping them into separate bandannas afterwards.

Are you up to any crafting on this New Year's Day?

P.S: By tying the bandanna on through the hoop in your dog's collar (s)he can't pull it any tighter. Obligatory health and safety notice!
PPS: Alfie definitely won't let me put a guinea pig bandanna on him. Shame, because I think he'd look fabulous in pink.
Bea isn't a fan of clothes per sé, as many dogs aren't (take note silly doggie fashion boutiques). Although she has a hand knitted jumper and a coat, one of which I make her wear when it's really chilly out, in all honesty she'd rather gamble about naked, happy as Larry.
...Until recently. When faffing about on Audrey the sewing machine a few weeks ago I whipped up a doggie bandanna. Bea looked very sweet in it but really I expected her to protest and chew it up within five minutes. But to my surprise she loved it! She paraded around the house, showing it off, then attempted to sleep on her face (I kid you not) so I couldn't take it off her. Perhaps, I thought, Bea has finally succumbed to my love for vintage fabrics!
(I apologise for her ears in the following photos - they just would not behave. In fact, I'm thinking of selling the one of her in red to the RAF for their next recruitment campaign.)
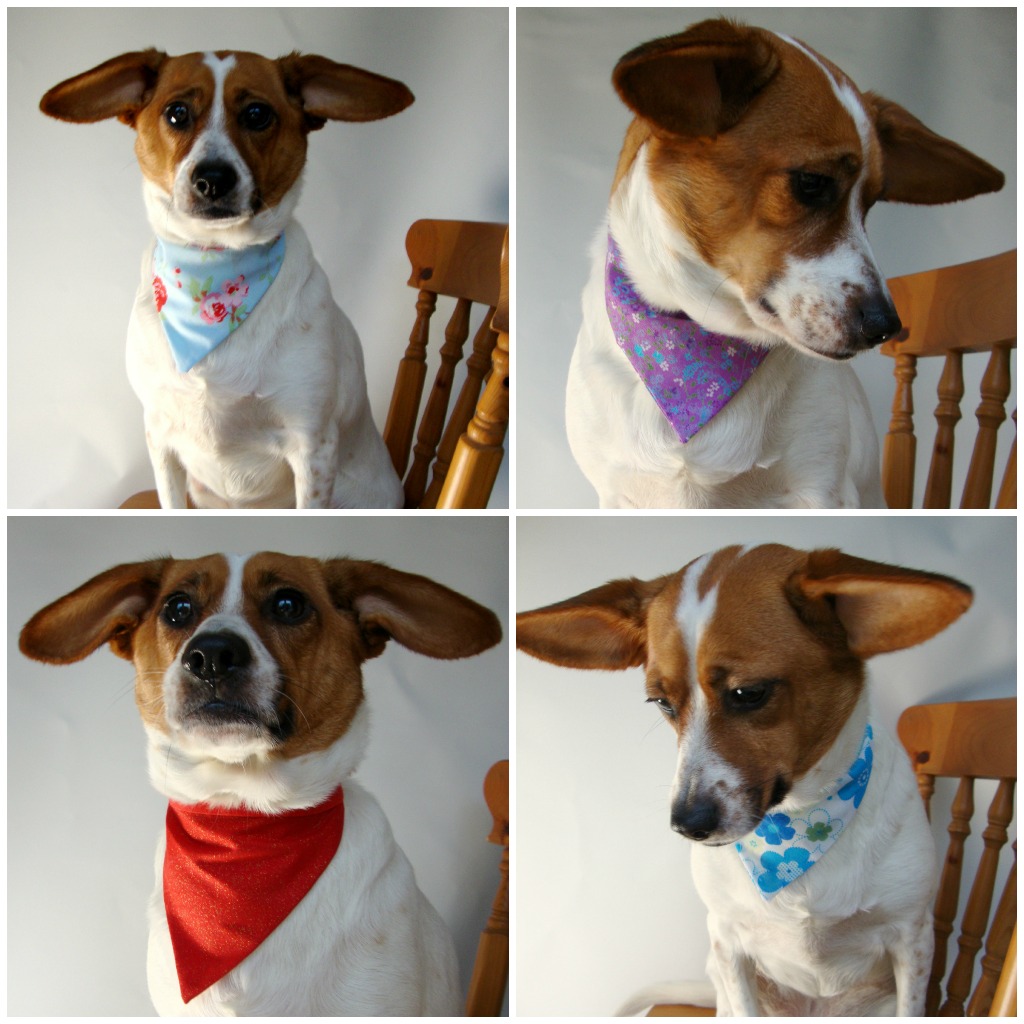
Since then I have made a few more in different colours. They are so quick and easy to make and your pooch could have an entire new wardrobe in less than an hour. They also make the ideal - postable - gift for the dog owner friend who has everything. I've never met a human who isn't as happy to receive a gift for their adored pet as they are for themselves! They make a brilliant way to use up fabric scraps, too.
You will need:
Your chosen fabric, ironed
Card
Half a metre of bias binding
Pins
Sewing machine (you can just as easily hand sew, it'll just take you longer)
Fabric marker pen/ tailor's chalk
1. Measure across your pooch's chest, then draw a line of the same length on your card, adding an extra centimetre for the seam allowance. Then add two more lines to make a triangle. How deep your triangle will be is up to you - I made Bea's fairly shallow because I didn't want her chewing the bottom corner.

2. Cut out your template and label it. I keep all my project templates in a tin then I can quickly make more in the future. Draw two triangles on the wrong side of your fabric and cut them out. Now pin, right sides together.

3. Leaving 5mm seam allowance, sew the 'v' of your triangle. Don't bother with the top edge. Turn it right side out, and trim the pointy bits off on the top edge.

4. Take your bias binding and fold in half with your fingers, all the way down the length. You could do this with the iron, but it often the iron removes the starch and makes the binding too stretchy. Position your triangle in the middle in the fold, pin, and sew along the entire length of the binding.

5. Finished! You can knock up many more really quickly, and they're machine washable too (well, a doggie mum thinks about these things). Also, if you're happy to use the same colour bias binding every time, you could make triangles in different fabrics and sew them all at once - just like bunting - snipping them into separate bandannas afterwards.

Are you up to any crafting on this New Year's Day?
P.S: By tying the bandanna on through the hoop in your dog's collar (s)he can't pull it any tighter. Obligatory health and safety notice!
PPS: Alfie definitely won't let me put a guinea pig bandanna on him. Shame, because I think he'd look fabulous in pink.


