

It's happened to us all, hasn't it. Whether it's your favourite teacup, the ugly toby jug your aunt gave you (oops) or the plate that didn't even make it home from the vintage fair undamaged thanks to that speed bump, we've all found chips in our chinaware and pottery, and it can be pretty heartbreaking when it's a beloved piece.
The other day I dropped off a box of unwanted clutter at a charity shop and was just on my way out when I spotted one of Those Items. You know, those perfect objects your brain is always subconsciously on the lookout for, but it's only once in a blue moon that they actually appear. In this case it was a gravy boat for my friend Liz. I'd been looking for the perfect one for her for several years, and here it was. It matched her gold edged green dinner set, and I knew it was exactly what we had both been looking for. After zapping her a quick photo and getting confirmation I paid £1 for it and off I went with my prize. The only problem was that its saucer had a number of chips on one edge. Determined not to let a few imperfections ruin my serendipitous victory, I decided to work out how to minimise those pesky chips as far as possible.
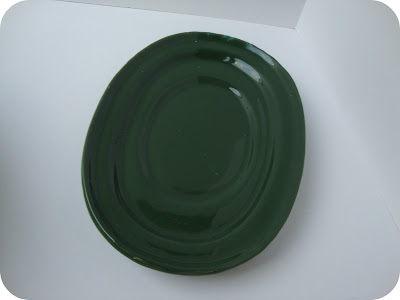
Note: I was dealing with a particularly tricky item here, because I needed to match the green colour. Chip repair is much easier on white objects! I like a challenge...


You will need:
- White Fimo polymer clay
- A fine paintbrush
- Ceramic paint if your item is anything other than white (you need so little that it's worth buying those teeny pots in you get in the kids' section at art shops, or in mug or piggy bank painting kits)
- Varnish the same finish as your chipped item - usually gloss
Start off by giving the piece a really good wash, as you don't want to be trapping any germs or dirt into the chips, especially where food is involved. This gravy boat was filthy! With clean fingers take a tiny amount of your Fimo and knead it a little to make it pliable.
All you have to do is use your Fimo as polyfiller. Push it into the chip and smooth it over with your fingers so that it blends flush with the china. Take your time, you can always remove the Fimo and start again until you're happy with the result. Remove any excess from around the chip; you want as little as possible to paint later.


Pop the item in the oven. You should bake Fimo at 130C for 30 mins, but if your piece is not ovenproof (ie., an ornament) you'll need to turn the oven down much lower and leave it in there longer. It's also a good idea to sprinkle some water on it too, avoiding getting the chip wet.
Allow the piece to cool completely, and use your sandpaper or emery board to smooth the Fimo so it's completely flush. Next, mix your ceramic paint to the colour required. Paint over the Fimo. You may need two coats. It was almost impossible to match the green colour exactly here so I aimed to make the chips as near as possible so they would no longer be obvious. Again, with white you won't even need paint and the repair will be far more difficult to spot - result!
Now you need to pop it back in the oven, again at 130C, for 20 minutes, to seal the ceramic paint. Once cool, varnish... and there you have it. Much improved!
One last note - if your chipped object has a gold edge which you're feeling nervous about painting back on, try a Sharpie Paint Marker in gold. You can buy them with very fine nibs and you'll get a much neater finish - then just varnish over the top.
One last note - if your chipped object has a gold edge which you're feeling nervous about painting back on, try a Sharpie Paint Marker in gold. You can buy them with very fine nibs and you'll get a much neater finish - then just varnish over the top.

Do you have any go-to methods for improving the look of chips to your much-loved chinaware?
Wishing you an accident free Wednesday,

This is a super helpful post, thanks for sharing!
ReplyDeleteWhy thank you :)
DeleteWow what a useful post! I will certainly be going back again to reread if I ever get any chipped pieces! xx
ReplyDeleteI seem to have had a glut of them lately so something had to be done! x
DeleteThis post is great! I definitely have a few plates that could use a makeover like this. :)
ReplyDeleteThanks Meredith, it's really nice of you to drop in!
DeleteAhh great tips, thanks so much for sharing!!
ReplyDeletexo
Thank you for your post! I bought a beautiful cup from an artisan of my region last year, for 25$ (approx 12 pounds), so I was really sad when I chipped it. Now I will be able to keep and use it for years to come!
ReplyDeleteThanks for this! My daughter is no longer in trouble.
ReplyDeleteThanks for this! My daughter is no longer in trouble.
ReplyDeletePlease can you tell me what varnish I should use
ReplyDeleteI use Americana DuraClear Matte or Gloss Varnish, available from all craft shops.
Delete