Showing posts with label jewellery. Show all posts

Friday, 26 April 2013

Wearing Literature on Your Sleeve


I'm very much a person who likes to wear my passions on my sleeve. Or collar. So it was pretty exciting to treat myself to this little beauty from Etsy recently, having had it sitting in my favourites list for quite some time. It's made by a lady called Rio, of LiteraryEmporioum

These also accidentally fell into my virtual basket...


Well this one was for my mum, so I had the perfect excuse! 


For me this is all about using beautiful handmade items to express something I'm really passionate about. And I'm not alone. I got in touch with Cory of Coryograpies and asked her why she chose books as the main theme for her gorgeous handmade jewellery.


"I've always been a big reader, a geeky nerd who likes non-fiction, but I stumbled on making book themed jewellery quite by accident.  I had been making little pieces of sushi out of Fimo for jewellery, and bought some little pieces of wood so I could make a bento box.  I was thinking about what other things I could make out of wood and a bookshelf came to mind!  I ended up finding a niche in the market, as there was no other seller that made necklaces that looked like bookshelves.  Out of their popularity I expanded into books made of Fimo for earrings, rings, etc.  They've always been my most popular items, and I meet so many interesting librarians, authors and bookworms who want to wear something that shows off how important books and reading is to them."


Etsy is full of amazing literary-themed items, and a few more of my favourites are below.

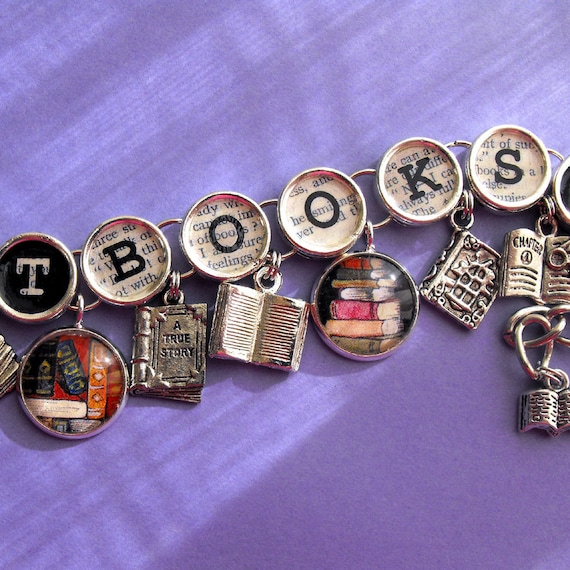
Got Books Book Charm Bracelet Literary Themed Bookish Jewelry
From here
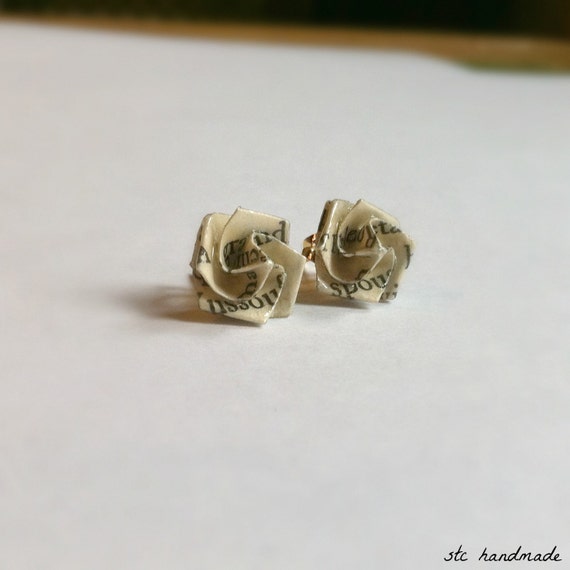
Literary Origami Rose Flower Post Earrings
From here

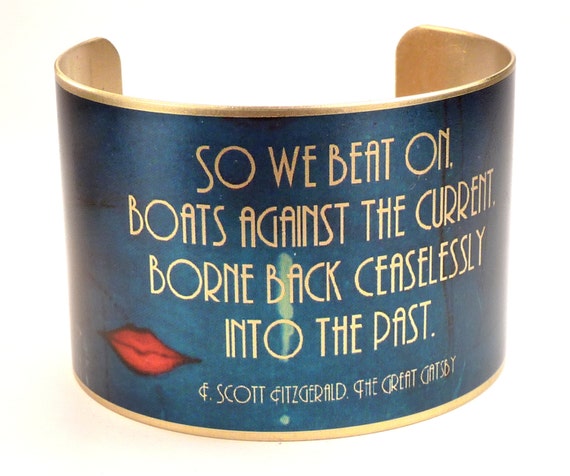
The Great Gatsby Jewelry, Literary Cuff Bracelet, Great Gatsby Quote, F. Scott Fitzgerald
From here

Thomas Jefferson Quote on Colonial Style Literary Art Print in China Blue - "I cannot live without books"
From here
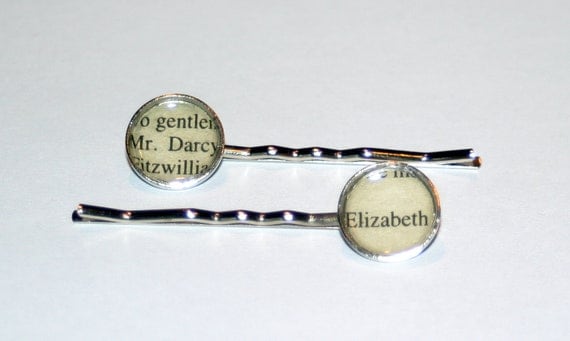
Literary Hair Pins - Pride and Prejudice, Mr Darcy and Elizabeth
From here
How about you, do you like to wear your interests on your sleeve?


Monday, 3 December 2012

How to Be a Thrifty Crafter, Part 2


Hello my dear crafty chums! Today is the second in my thrifty crafting feature (part one here). 

I was in my early teens (stop me if you've heard this story before - this is going somewhere!) when I first stumbled across the idea of owning a doll's house as part of a hobby, rather than a child's toy. I had grown out of playing with my own beloved house years before, but as my grandad had made it for me and it was very special I didn't feel I could move it on to a new home, so it simply sat in the spare bedroom, ignored.

One day I was on a visit to Rochester with my family when I spotted a shop selling doll's house miniatures. I was instantly captivated by the idea of grown ups having doll's houses, and collecting furniture for them. I could create my dream house, or even my dream world, from any era - and I already had the house! 

There was just one problem. I could see from a quick glance in the shop's window and then a Dolls House Emporium catalogue that I had fallen in love with a hobby which cost a lot of money. I'm talking hundreds. Thousands. It's a popular hobby for the middle and upper class retired, and no wonder. I was a teenager with a minuscule income. I quickly realised I was going to have to use my imagination and a lot of creativity to turn my doll's house into the vision I held in my head. 

That Christmas, I received just the help I was looking for, in the form of these two books:


Andrea Barham and Patricia King opened my eyes to the world of making your own doll's house miniatures out of things you have hanging around your house. Perfect! Since then I have made all sort of craft projects - not just miniatures - simply by looking at household objects from a different perspective. I have added many items to my 'must have' crafting list, and I'm going to share this list with you... (yes, we finally made it to the end of my little story!)


The contents of my dressing table are made from household finds. Bits of lace, an old keychain, a candle made from a birthday cake candle and a button, and a perfume bottle made from beads. 


1. Head for your jewellery box. We all have old costume jewellery which is now out of date or broken. Grab these items like Gollum and clutch them close to your chest. They are incredibly useful for all sort of crafting projects. Next, any old Primark handbags, embellished shoes or belts. Cut the shiny bits and buckles off and add those to your pile. Old costume watch? Keep that too. Hurrah!


Just look what clever Patricia King made with an old pair of sunglasses. I'm tempted to wrap some old frames with washi tape and wear them when thinking up crafty plans...


2. We're on a roll! Head out to the garage or shed. Take a note of any semi-used pots of paint or cans of spray paint. Look out for wire, garden twine, lovely pebbles (perfect for painting!), varnish, metal washers, plywood and balsa wood. 

3. Think like a child. Remember junk modelling? Very handy when it comes to thinking about packaging. Never throw anything out without checking to see if there's anything useable on it. Cereal boxes provide useful cardboard, lipstick cylinders, toothpaste lids, metal wine bottle tops... the list goes on!


An old disposable razor and a toothpaste tube. 
Another of Patricia King's creations.


4. Now you've gone shopping in your home, it's time to shop from other people's! Once or twice a year I email friends and family, and ask them ever so nicely to have a clear out. I make it easy for them by giving them a list of things I'm looking for. The first time I did this I was in the sixth form, and hadn't told more than one or two close friends about my crafting hobby. They found my requests a little odd at first, understandably, but then they really got into the spirit of it and produced some brilliant finds, including a guitar plectrum (perfect for a spot of Tatty Devine-style jewellery making!), an old locket - which I made into a double photo frame for my doll's house, and some handy bits of driftwood! Since then I've handed this list out to work colleagues and family alike, and always find they're genuinely interested in hearing what I'm planning to make with it all. And as you never know what you're going to get your little gifts can inspire all sorts of new ideas. 


I have popped my full list of the items I ask/look for here, but first, a little word about storage. You'll need it. I only store small and medium items. There is no need to keep every cereal box that passes through your home - if you need cardboard for a project, you know it's in the cupboard. I am making my own Christmas crackers this year so have kept (and microwaved to get rid of germs) twelve loo role centres, but I don't keep the centre of every loo roll used in my house! You don't want to become like one of those poor hoarder folk off the telly... 

If you're collecting small items such as jewellery findings, I learnt early on that they need to be carefully stored and easily accessible. There's nothing more annoying than losing a precious hour of your Sunday afternoon to hunting for that teeny tiny cabochon. I use a box with lots of compartments, so I keep earrings, beads, brooches, chains, etc, in separate sections. 


I like this way of storing because I can easily take a look inside to remind myself of what I have in stock. 


I mentioned in my last post useful shops for art and craft materials. If you're struggling to find handy items for free, of course there's always car boot sales and charity shops. I've found loads of handy bits of bobs from those. It's also been known for me to buy cheap jewellery from Primark, only to dismantle it an hour later. They often have sale racks full of costume jewellery - score! 


The jewel on my mini Jubilee hat was a Primark pendant, bought for £1.50. It's supposed to look like Kate's engagement ring. 


Some handy books and blogs if you fancy having a bash at crafting with household items:


Inspiring blogs:


Do you make things out of household finds? I'd love to hear about your projects!

Have a collectible Monday,


P.S: If you have borrowers residing in your home, please treat them kindly and at least leave some useful items for them to borrow. Bea seems to think we have some here, as she thoroughly sniffs around all the skirting boards every morning.
PPS: New buttons will be in the Etsy shop before the end of the week :)

Wednesday, 23 May 2012

How to Make a Teapot Necklace


You know I have a bit of a thing for tea, right? Of course you do. You may also know that one of my many crafty hobbies is making miniatures for my doll's house. (If you fancy a look around my house click here).

A couple of years ago the fashion world went crazy for all things tea-related and quirky - probably because the new Alice in Wonderland film came out - and I bought a teapot necklace from Accessorize. I've had compliments and comments about how 'me' it is every time I've worn it. But then I thought, 'hey, I make miniatures all the time, why shouldn't I have a go at making my own teapot necklace? That way, I can have one in as many different colours and designs as my heart desires!'

Seeing as we're all gearing up for the Jubilee and the nation has once again gone potty (ahem) for all things British and tea, I thought I'd show you how to make a teapot necklace of your very own.


You will need:


  • A necklace chain - you can use one you already have and just remove its pendant, or you can buy them cheaply on eBay. I prefer a long one so it hangs just above my navel, but it's entirely up to you.
  • Fimo modelling clay. Fimo comes in all the colours of the rainbow, and one square pack should make four teapots. A square is £2.29 from Hobbycraft, or if you resent the supermarket of the craft world as much as I do, eBay or independent craft shops will sell it too. You can buy any colour you like, but I chose white, and then painted my teapot in my chosen colour afterwards. Transparent white looks great if you want to go for the classy porcelain look.
  • A craft or Stanley knife
  • Acrylic or ceramic paints in your chosen colours (shop in the kids' section, it's cheaper and you may be able to get those dinky little selection pots!)
  • A clean baking sheet. I work a lot with Fimo so I use an old bathroom tile because then I can transfer my model straight into the oven without damaging it- if you find one in a skip keep it!
  • A fine paintbrush.
  • Matte or gloss varnish, depending on the finish you prefer. Clear nail varnish works well.
  • Clean fingers and a clean work surface. The red tools you see above are entirely optional.
  • Sandpaper or an emery board


1. Use your knife to cut about a quarter of your Fimo off the block, and spend a few minutes kneading it until it's pliable. Cut a chunk again and roll yourself a ball to make the body of your teapot. I made mine around 2cm diameter, but there are no rules, it depends how big you want your finished pendant to be.

2. Roll a very thin sausage of clay, curl it into a ring slightly smaller than the diameter of your body, and press the body onto the ring to make your teapot's foot.

3. Make another small ball. Roll it as you would to make a log, but taper it so it's thinner at one end than the other. This will be your spout. It's the trickiest part, but take your time until you're happy - the best thing about Fimo clay is that if it doesn't work you can just start again! Cut a V in the thinner end, and press it onto the body of your teapot, using your fingers to blend over the join.


4. Make another very thin log, and attach it to make a handle. Positioning the top of your handle so that it faces downwards will make for a stronger bond - important as this is the part from which your pendant will hang. Make sure your handle is large enough for the end of your necklace chain to fit through. It can sometimes help to use a small paintbrush handle to help you get the curved shape you need. 

5. Use your knife to score a circle in the top of the body to give the impression of a lid. Or the lid of a Sharpie marker works perfectly (make sure it's ink-free) - just press down. Roll a tiny ball and press on to make your lid's handle. 

6. Now you have the shape of your teapot! Use your fingers to smooth out any creases, but don't worry too much because you can sand it after baking. Once you're happy, pop it in the oven, on 130C for 20 minutes. You'll find it's soft when you take it out. If it doesn't harden as it cools, it needs a little longer in the oven.

7. Once your teapot is cool use your sandpaper or an emery board to smooth away any imperfections. Now you get to paint! You can go with simple white, or paint it all over or with elaborate designs... whatever you like. Gold paint looks amazing too.


8. If you've used ceramic paint like I did, pop it back in the oven for 10 minutes. Once your paint's dry, you just need to varnish it and let it dry again. Thread it onto your chain, and hey presto - you'll be getting compliments galore!


You can experiment with different size teapots on different length chains.


Enjoy a tea-filled Wednesday!


P.S: If you fancy a teapot necklace of your own but don't want to make one, I'll be selling them in the Etsy shop I plan to have up and running before too long, so just bob me an email to register your interest and I'll be in touch when it's all set up! x