Showing posts with label handmade. Show all posts

Monday, 12 August 2013

My Weekend at Folksy Summer School


If you didn't already know from my hyper-tweeting last week, I went to Folksy Summer School all weekend!


I had a brilliant time, surrounded by people who are just like me! The event was very relaxed and bohemian, with lots of events all happening at the same time so you could wander around and take things slowly, or schedule in events to get the most of your time there.

I took a mixed approach, ambling in and out of the classroom tent to listen to the speakers I felt would be relevant, and taking in the craft demonstrations as well, with a one-to-one with Patricia van den Akker of The Design Trust (the woman is brilliant, seriously brilliant) and an inspiring, product photography class with Lyndsey James too. 


The location was Ecclesall Woods in Sheffield; another big motivation behind my buying tickets, as us Northerners often feel such events are lost to London. I was impressed that Folksy decided to hold this event in their hometown. As Folksy owner James Boardwell casually put it, "well we often walk our dog here, so you know... it just made sense." I felt the woodland environment really contributed to the relaxed holiday feel. A conference centre in the middle of a city would have felt much more 'corporate training weekend'. 


Despite the venue feeling quite intimate, the weekend was jam-packed with quality events. The speakers were lined up at a heady pace over the two days - around twenty-four in total - and including Emma Jones of Enterprise Nation, Tilly Walnes of Tilly and the Buttons and The Great British Sewing Bee fame, Claire Bates of Landbaby, Polly Dugdale of Handmade Horizons and Chloe Haywood of Hatastic.

I filled an entire notebook with their advice and ideas and food for thought, and have some pretty testing business homework to do this week! 


There were craft demonstrations in screenprinting (Sue Westergaard, below, was a marvel), bookbinding, letterpress, sewing and crochet. The Amazings were demonstrating knitting, wet felting and mosaics. The photography classes were happening in a wonky wooden hut called Hector's House, and in amongst it all was yummy coffee, tea and fruit in constant supply, delicious sandwiches for sale (I'm sick of sandwiches so I don't say that lightly. Best sarnie ever, folks), and a tuck shop run by local shop Cocoa


Highlights of my weekend included: 

  • Having lots of 'yes, that's me!' moments in the classroom and scribbling tonnes of notes - that full notebook alone is worth the cost of attending this weekend. Quality advice covering every aspect of my business is bargainous training indeed. 
  • Eating lunch in the sunshine, looking up, seeing the editor of Mollie Makes, the owner of Folksy, The Amazings and Doug Richard of Dragons' Den and School for Startups chatting away to attendees around me and thinking, 'heh! Mad world!' I loved that the speakers mixed in with everyone, no one made a big deal of it, one-to-ones were conducted perched on tree stumps, and all the speakers attended one another's talks so they too could learn.
  • A serene feeling of utter belonging to and passion for the world of handmade and craft. The sure knowledge, when surrounded by so much enthusiasm for this world, that I too have found my rightful place, and all the hard work is so worth it. 
  • Photography 'aha' moments. Winter photography for this blog is an issue for half my year!
  • Meeting new friends, and knowing immediately we'll get on because of our love of craft and community. Sharing a taxi from the train station with someone I met on Twitter. 
  • Coming away from the weekend with an action plan, enthusiasm and inspiration. I wish I could bottle the stuff.


As well as the major achievements of choosing such a suitable venue, pulling in big name speakers and combining them with lesser-known speakers with lots to say and inspiring stories to tell, and making sure the flow of the event worked, I noted lots of details throughout the weekend which all added up to make Folksy Summer School special. Things like the constant supply of refreshments with a trusting 'help yourself' attitude, volunteers who genuinely never stopped smiling and handing out sweets (yes yes, food impresses me!), emails before the event with every detail about what to expect during the weekend and how to get the most out of it, a relaxed, non-supervisory attitude on the part of the organisers so we felt at home, and free ice lollies in the intervals! 


As well as the images I snapped as I took in the experience, you'll find a tonne of pictures will emerge over the next few days via Folksy's Tumblr page, as well as #FolksySS and #folksyschool.

I'm back off to the day job this morning, but you can be sure I'll be typing up my notes in my lunchbreak.


Monday, 22 April 2013

Latest Sewing Project and an Important Lesson: Bullfinch Cushion


Many of you will by now have noticed that I take a lot of my inspiration for creative projects from British nature. When this little chap first visited the damson tree in my garden a couple of weeks ago I was quite literally dazzled by his beauty. I have spent hours hanging out of my window, extremely heavy camera with long lens in hand, trying to snap the perfect picture. These images don't do justice to this bullfinch's gorgeous salmon pink colour. Not only is he vibrant, but he is round and cute too! 


As he's been munching his way through all of my damson buds (less fruit for my crumbles this autumn then!) he has had me captivated, and his good lady wife as well, who was much harder to spot. And as I snapped away, I decided that the bullfinch really is my favourite garden bird. Inevitably, they were going to inspire creative projects before long. 


Here is a pendant I snapped up a while back from Accessorize. 

And of course Mr. Bullfinch had to turn up on a button...


This chap is in my shop here awaiting a new home.
So when I decided to make my nan a present of a cushion when she came to visit the week before last, a bullfinch seemed like the perfect embellishment for it.


Now, making any sewing project for my nan is like proffering a handmade cake to Mary Berry. At least, that's how it felt at the time. Sadly my nan's hands are painfully arthritic now, meaning her own crafting days are behind her, so as the sort of reincarnation of her own crafty soul I felt a fair bit of pressure to produce something, well, good!

How hard could it be? I have made something similar before - a robin cushion - and it turned out well enough. Alas, this time I think I put too much pressure on myself, and this cushion became the bane of my week! 

Its tummy had to be unpicked and re-sewn on the machine nine times. My machine kept jamming, at one point my zigzag stitch kept coming out upside down, however many time I re-threaded Audrey (yes, my sewing machine is called Audrey). I randomly lost all knowledge on how to do chain stitch, so I fear his legs and feet look somewhat... diseased. As for the cushion itself.... well, the corners turned out rather baggy, and my bullfinch somehow ended up not being in the middle, leading to some rather hasty re-stitching. 

At one point I found myself staring, incredulous, at this project and asking myself how in the quest to do something nice so many things could go so wrong, so many times over. I think it was because my nan was staying in the house at the time, and I had to keep sneaking off to work on it. Oh, the pressure I do put myself under at times!


Anyway, in the end I managed to wrestle it into something halfway presentable. My nan is my mum's mum, and how I was reminded of this when I sheepishly handed over her gift, feeling like a five year old presenting something they have made to their teacher. She looked at it for quite some time without speaking, before declaring, "You made this just for me? It's beautiful, dear, and it will match my chair perfectly. How clever you are." 

Aren't nans fantastic? 

The wonderful thing about these nightmareish crafty undertakings is that I always learn a heck of a lot. Once I calmed myself down, cut out another tummy piece and applied interfacing, it actually went on within two attempts (sigh.) Lesson One: use interfacing with applique! 

Also, once I'd handed over the cushion and been honest about the problems I'd had, my nan was able to offer sound advice for the next cushion I attempt. Of course, I wrote it all down in my Sewing Scrapbook of Useful Lessons.


Lesson Two: "Don't attempt challenging projects when you already have too much on your plate." The best creative work is borne out of inspiration and relaxation - it's supposed to be fun. This is something I forgot in this project, and it showed. 

Nevertheless, I ended up being quite proud of my cushion, because it was fun to take some authentic creative inspiration right through the design process, the colour selection (thank you to everyone on Twitter who helped with that, you can see what it was for now!) to an end product.

It's often been quoted that Islamic artists put a mistake in every piece they make to demonstrate that God alone is perfect. I'm not at all religious, but this idea has stayed with me, and I use mistakes to remind myself that creativity is not about creating something perfect, it's about the process, the learning, the reminder that something handmade - however flawed - will always be more precious than anything mass-produced by a machine, and ultimately, a handmade gift shows you care in a way that nothing else can. Five year olds know this when they confidently hand over a glittery, gluey brightly coloured depiction of a happy dinosaur to a proud parent, and it makes me wonder at what point we forget this important lesson during the growing up process. 


It's amazing what you can learn from a bullfinch, eh?


PS: I'll have a special how-to for #PostCircle peeps and post-lovers on Wednesday!

Tuesday, 12 March 2013

A Buttony Giveaway

This giveaway has now closed. Thank you to everyone who entered, the winner will be announced later today!


As promised I am pleased to offer up a small giveaway in celebration of this blog reaching 200 GFC followers!


When I started blogging I distinctly remember getting excited that one of my posts got eleven views in one day. I quickly stamped on that habit - not because I'm not grateful that people want to read my blog - but because I never wanted to define this blog's success by its pageviews. I'm far more excited that over three hundred and fifty of you - through various platforms - have identified enough with something I've said to want to hang around to read more. I do a little dance whenever someone joins me, and am thankful and overjoyed that each and every one of you is here.


So as a little thank you, the winner of this giveaway will receive their choice of any two items from my Etsy shop. To enter, all you need to do is comment below. This giveaway is open worldwide, and will close on Tuesday 19th March (Beatrix asked me to choose that date as it is her birthday!)


Enjoy, and thank you again for joining me in the often mad but always welcoming land of Miss Beatrix.


Friday, 4 January 2013

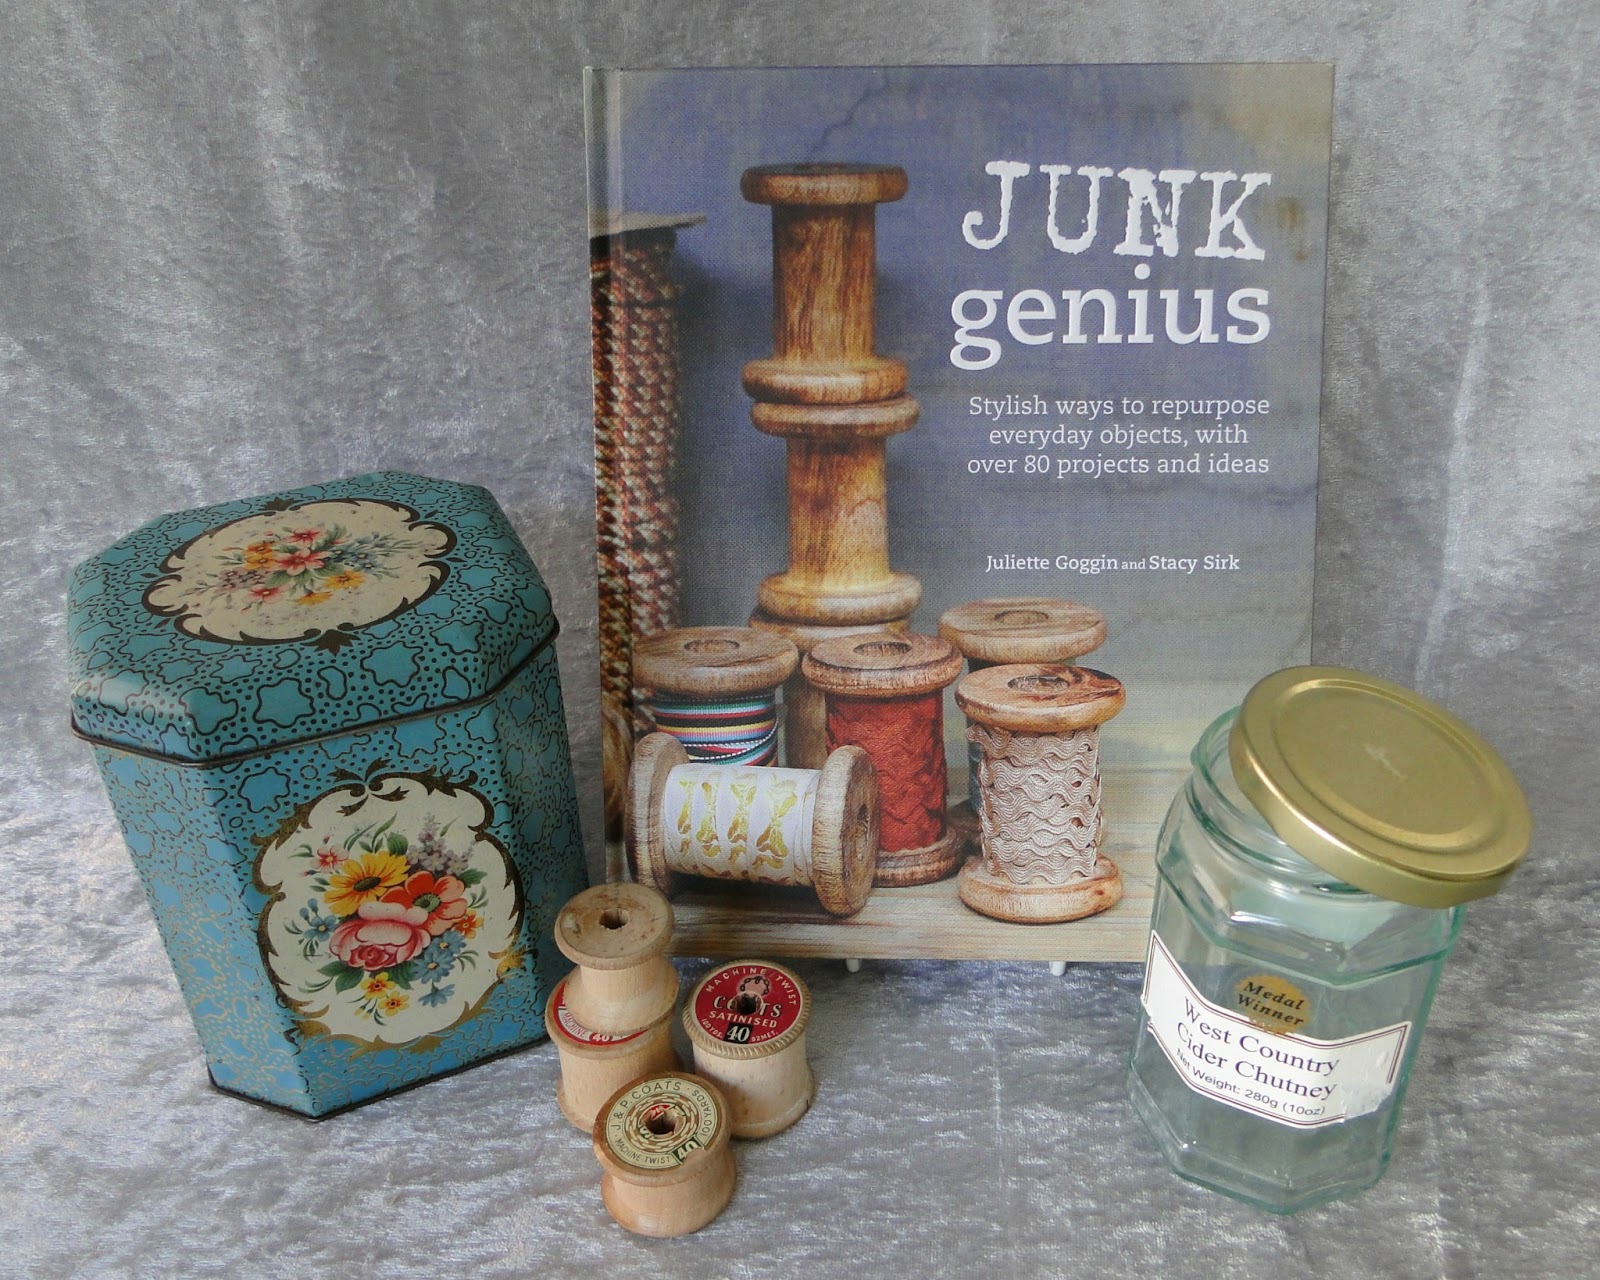
Junk Genius: A Book Review


Junk Genius: Stylish Ways to Repurpose Everyday Objects, with Over 80 Projects and Ideas, by Juliette Goggin and Stacy Sirk. 

I stumbled upon this upcycling craft book on Amazon while adding others to my wishlist. I hadn't heard of it before and wondered why, only to realise my discovery must have been an early one, it only having been published in September, as it's popped up in several craft magazines since! So when a Waterstones voucher came my way, I knew exactly what I wanted to spend it on.


You may recognise Juliette Goggin's name as she's a regular on the channel 4 tv programme Super Scrimpers, in which you'll find her patiently showing young sorts how to makeover their clothes and home furnishings. Her career includes designing her own gift and home collection, and sourcing products for names such as Cath Kidston and French Connection. 

Stacy Sirk works in product development alongside some huge brands, such as Urban Outfitters, Macy's and Nike. The pair wrote this book from opposite sides of the pond, reminding me of another very successful craft book of 2012! Terminology throughout the book is primarily American with the British alternative term in brackets, and this pleased me, because we all want to feel a book is written 'for us'. 


 The first section of this rather sensual (yes, I said sensual) hardback is dedicated to 'finding junk'. This reminded me of Sarah Moore's Homemade Gifts Vintage Style and I always find it handy to get an author's viewpoint on the best ways to find lovely treasures to upcycle. I get really excited about thrifting, so a section dedicated to this filled me with enthusiasm. There then follows a list of '40 Common Items' - perfect if you're like me and carry round a shopping list of the things you're after, only to become overwhelmed.

The projects themselves are divided into sections, Jewelry and Decoration, Fabric and Trims, Paper and Card, China and Wood, Glass and Mirror, Metal and Wire and Furniture and Furnishings.


So the all important question here, is what did I think of the content - the projects themselves? Well there are certainly some projects where the idea is quite well worn; decorated decanters, for example, covered notebooks and flower brooches. BUT I think that depends on how much a seasoned upcycling/craft book reader you are, and there were many, many more projects that were new ideas to me and got me adding them to my 'to try' list. The tweed laptop bag (recently in Mollie Makes), thimble pendants, bunting made from ties, and a rather beautiful medicine cabinet all gave me 'aha' moments. If you have never tried upcycling before or are new to the vintage-infused lifestyle, you'll find plenty of ideas, presented in a fresh way. 

If you're already a crafter, I'd say many of the projects don't need a how-to, simply the images will be enough to spark the idea and get you thinking of new ways to use thrifted finds. However, if you're new to this sort of thing, or wouldn't know, like me, how to make a laptop bag, you'll find the instructions full and clear. 


The images throughout the book are beautiful, adding value as an idea generator and source of inspiration as much as anything. This book's about introducing you to a new lifestyle, a new way of thinking, as well as providing ideas for a quick gift for Aunt Mildred. I really like the fact that the projects aren't overly feminine. Although many will inevitably appeal only to women, if you're looking for a gift idea for a chap you'll find plenty, and male readers can be inspired too. 

All in all I was really pleased with this book. A brand new hardback isn't something I would have bought without a voucher, so I most certainly would have returned it if it couldn't bring something to my life that others in my collection can't. I'll be using it for inspiration and as a resource for fresh ideas, and think it would be a real revelation to those who are new to the idea of making new from old, especially on a budget. 


It's difficult not to compare it to Granny Chic as there are a number of similarities other than the geographical space between the authors. A curtain embellished with doilies, and a lace-covered lampshade, for example. This is either unfortunate timing - no one's fault, after all - or a bonus, as it just shows how popular vintage and upcycling are right now. For me it was a good thing, and as I don't see vintage and making new from old as a passing craze in my own life, for me, this is just more of the stuff I love to read about. To be fair, this book was published [just] first!


Junk Genius left me with a warm, homely feeling, a renewed excitement about getting out there and tracking down finds - especially little ones to make into quirky jewellery - and lots of new ideas. It would also make that most pointless and hated of things... an 'ideal coffee table book'. Gah. Pretentious, moi? My copy has certainly being hanging around my living room over the festive period, being picked up and passed around. Just what these sorts of books are perfect for. 

Have you stumbled across any cracking craft/vintage books lately? 


Tuesday, 1 January 2013

DIY: Easy Vintage Style Doggie Bandanna

Happy New Year!

Bea isn't a fan of clothes per sé, as many dogs aren't (take note silly doggie fashion boutiques). Although she has a hand knitted jumper and a coat, one of which I make her wear when it's really chilly out, in all honesty she'd rather gamble about naked, happy as Larry.

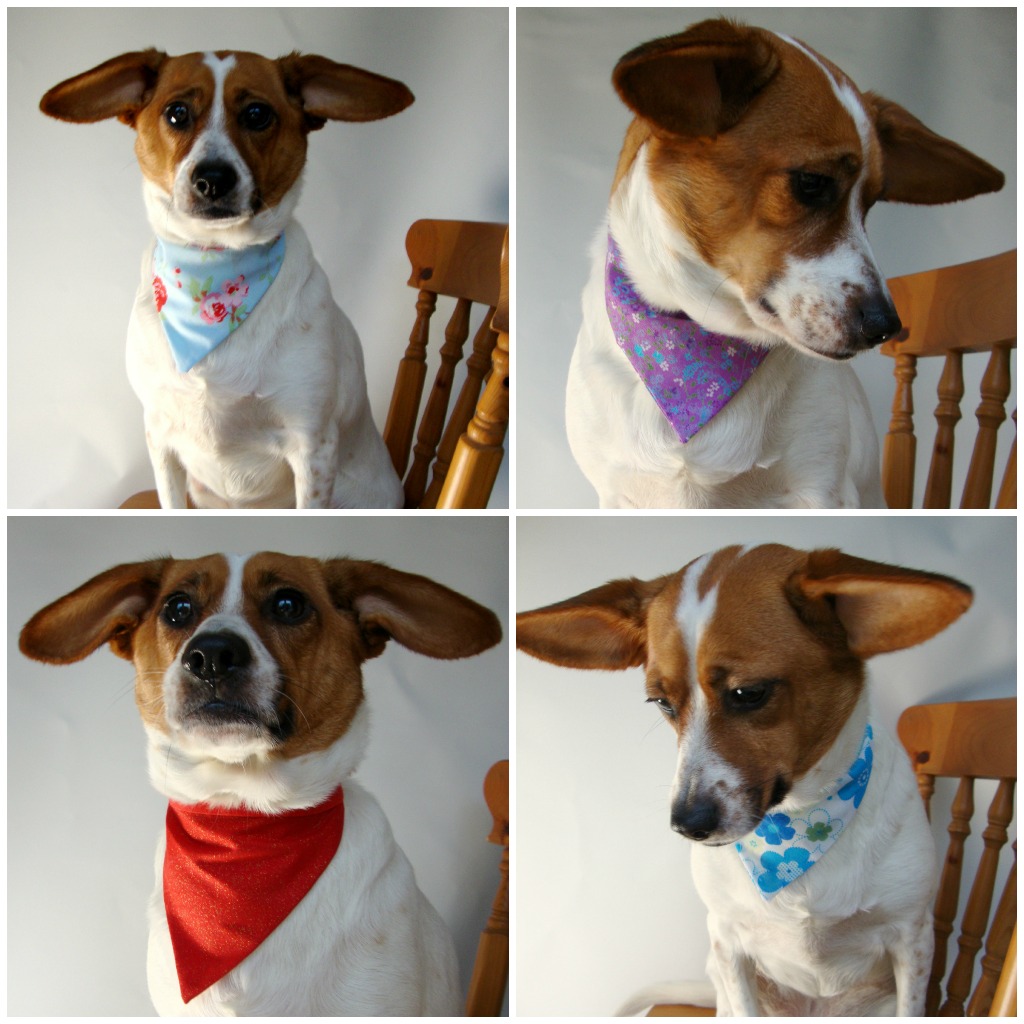
...Until recently. When faffing about on Audrey the sewing machine a few weeks ago I whipped up a doggie bandanna. Bea looked very sweet in it but really I expected her to protest and chew it up within five minutes. But to my surprise she loved it! She paraded around the house, showing it off, then attempted to sleep on her face (I kid you not) so I couldn't take it off her. Perhaps, I thought, Bea has finally succumbed to my love for vintage fabrics!

(I apologise for her ears in the following photos - they just would not behave. In fact, I'm thinking of selling the one of her in red to the RAF for their next recruitment campaign.)


Since then I have made a few more in different colours. They are so quick and easy to make and your pooch could have an entire new wardrobe in less than an hour. They also make the ideal - postable - gift for the dog owner friend who has everything. I've never met a human who isn't as happy to receive a gift for their adored pet as they are for themselves! They make a brilliant way to use up fabric scraps, too.

You will need:
Your chosen fabric, ironed
Card
Half a metre of bias binding
Pins
Sewing machine (you can just as easily hand sew, it'll just take you longer)
Fabric marker pen/ tailor's chalk

1. Measure across your pooch's chest, then draw a line of the same length on your card, adding an extra centimetre for the seam allowance. Then add two more lines to make a triangle. How deep your triangle will be is up to you - I made Bea's fairly shallow because I didn't want her chewing the bottom corner.


2. Cut out your template and label it. I keep all my project templates in a tin then I can quickly make more in the future. Draw two triangles on the wrong side of your fabric and cut them out. Now pin, right sides together.


3. Leaving 5mm seam allowance, sew the 'v' of your triangle. Don't bother with the top edge. Turn it right side out, and trim the pointy bits off on the top edge.


4. Take your bias binding and fold in half with your fingers, all the way down the length. You could do this with the iron, but it often the iron removes the starch and makes the binding too stretchy. Position your triangle in the middle in the fold, pin, and sew along the entire length of the binding.


5. Finished! You can knock up many more really quickly, and they're machine washable too (well, a doggie mum thinks about these things). Also, if you're happy to use the same colour bias binding every time, you could make triangles in different fabrics and sew them all at once - just like bunting - snipping them into separate bandannas afterwards.


Are you up to any crafting on this New Year's Day?


P.S: By tying the bandanna on through the hoop in your dog's collar (s)he can't pull it any tighter. Obligatory health and safety notice!

PPS: Alfie definitely won't let me put a guinea pig bandanna on him. Shame, because I think he'd look fabulous in pink.